The holiday season is a time for twinkling lights, cherished traditions, and the irresistible aroma of homemade treats wafting from the kitchen. While classic sugar cookies and gingerbread houses often take center stage, there’s something uniquely joyful about a dessert that combines nostalgic flavor with a playful, festive form. Enter the Christmas Tree Rice Krispies Treat—a project that is as fun to create as it is delicious to eat.
This isn’t just about pressing cereal into a pan. This is a culinary craft, a chance to gather the family and build an edible Christmas tree forest of your very own. These treats are the perfect combination of simplicity and creativity. They are incredibly easy for little hands to help with, yet they offer a beautiful, impressive result that will be the star of any cookie plate or holiday party. In this detailed guide, we will walk through every step, from achieving the perfect, non-sticky texture to the art of decorating your edible evergreens, ensuring your Christmas Tree Rice Krispies are a resounding success.
Tips for Successful Cooking: The Foundation of a Perfect Treat
Before you melt your first marshmallow, understanding a few key principles will elevate your Rice Krispies treats from good to absolutely spectacular.
- The Golden Rule: Low and Slow Melting. The single most important step is melting the butter and marshmallows together over low heat. Rushing this process by cranking up the burner will result in tough, hard marshmallows that are difficult to mix and can create a greasy, hardened treat. Patience is your best friend here.
- Butter is Your Best Friend (and Anti-Stick Agent). Generously grease your saucepan, spatula, and hands. The butter in the recipe is crucial, but an extra coating on your tools and hands will prevent the incredibly sticky marshmallow mixture from becoming a nightmare to handle. For your hands, keep a small bowl of softened butter nearby to re-grease as needed.
- The Power of Fresh Marshmallows. For the best texture and melting ability, use fresh, name-brand marshmallows. Older or generic marshmallows can be drier and may not melt as smoothly, leading to a less cohesive treat.
- Don’t Wait to Incorporate the Cereal. The moment the marshmallow mixture is smooth and fully melted, remove it from the heat and immediately add the cereal. The residual heat from the pot will be enough to coat everything. If you leave the mixture on the heat with the cereal, it can become overly dense and hard.
- Mix with Care, but Thoroughly. Use a greased spatula to gently but firmly fold the cereal into the marshmallow mixture. You want every piece of cereal to be coated, but avoid vigorous stirring which can crush the cereal and make the treats dense.
- Press, Don’t Pack. When shaping the trees in the mold or with your hands, press the mixture just firmly enough for it to hold its shape. Over-packing it will create a tough, hard-to-bite treat instead of the light, airy snap we all love.
- The Decorating Timeline: Patience is Key. Allow your trees to set completely and cool to room temperature before you even think about decorating. If you apply warm icing or melted chocolate to a warm tree, it will melt into a messy puddle. For the cleanest look, let them set for at least an hour.
Frequently Asked Questions (FAQ)
Q: I don’t have a Christmas tree mold. Can I still make these?
A: Absolutely! You have two great options:
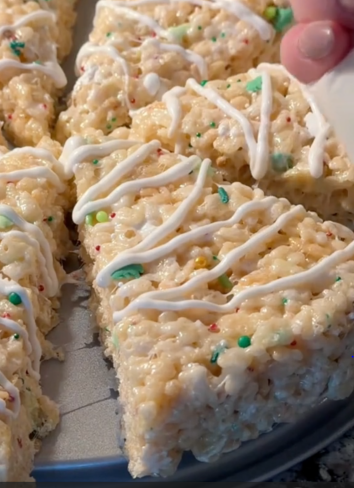
- Freehand Cutting: Press the mixture into a greased 9×13 inch pan. Once it has set and cooled, use a sharp knife to cut it into triangles of various sizes. You can use a small square from the bottom as the “trunk.”
- Cookie Cutters: Press the mixture firmly into a well-greased, metal Christmas tree-shaped cookie cutter placed on a parchment-lined baking sheet. Use a small tool or your finger to press it in evenly, then carefully push the shaped tree out.
Q: My mixture is too sticky to handle. What did I do wrong?
A: This is almost always due to the mixture still being warm. Allow it to cool for a few more minutes. Also, ensure you are generously greasing your hands with butter. The heat from your hands can soften the marshmallows, so re-greasing is essential.
Q: Can I make these ahead of time?
A: Yes, they are a great make-ahead treat! Store the fully decorated trees in a single layer in an airtight container at room temperature for up to 3 days. For longer storage, you can freeze them for up to a month. Separate layers with parchment paper to prevent sticking.
Q: My treats turned out hard. What happened?
A: Hard treats are typically caused by one of two things: overheating the marshmallow mixture (see Tip #1) or over-packing the cereal mixture when pressing it into the mold or pan.
Q: Can I add other flavors or colors?
A: Definitely! To make green trees, add a few drops of green gel food coloring to the marshmallow mixture just after it has melted and before you add the cereal. Stir until the color is uniform. You can also add a teaspoon of vanilla extract or a pinch of cinnamon for extra flavor.
Q: What can I use for decoration besides icing?
A: The possibilities are endless!
- Sprinkles: Star-shaped sprinkles for the top, or nonpareils for “ornaments.”
- Candies: M&Ms, Red Hots, or Skittles make perfect, colorful baubles.
- Edible Glitter or Sanding Sugar: For a sparkling, snowy effect.
- Pretzel Sticks: A small piece makes for a great tree trunk.
The Recipe: Festive Christmas Tree Rice Krispies Treats
This recipe yields a forest of approximately 8-10 medium-sized trees, depending on your mold size.
Ingredients:
- 4 tablespoons (1/2 stick) unsalted butter, plus more for greasing
- 1 (10-ounce) bag of marshmallows (about 40 regular marshmallows)
- 1 teaspoon vanilla extract (optional, for flavor)
- Green gel food coloring (as desired)
- 6 cups Rice Krispies cereal (or generic crispy rice cereal)
- For the “Trunks”: 8-10 small pretzel sticks, broken in half
For Decorating:
- 1 cup green candy melts or green melting wafers (OR 1 cup white chocolate chips + green food coloring)
- Optional: Icing tubes in various colors (red, yellow, blue)
- Optional: Star-shaped sprinkles, nonpareils, sanding sugar, etc.
Equipment:
- Large saucepan
- Wooden spoon or silicone spatula
- Christmas tree silicone mold(s) OR a 9×13 inch baking pan
- Parchment paper
- Cooling rack
- Microwave-safe bowl or piping bag
Instructions:
Part 1: Making the Base Mixture
- Prepare Your Workspace: Generously grease your saucepan, spatula, and Christmas tree molds with butter. If you are using a pan instead of a mold, line it with parchment paper and grease the paper. Set aside.
- Melt the Butter and Marshmallows: In the large saucepan over low heat, melt the 4 tablespoons of butter. Once melted, add the entire bag of marshmallows. Stir continuously with your greased spatula until the marshmallows are completely melted and the mixture is smooth. This should take 5-7 minutes.
- Add Flavor and Color: Remove the saucepan from the heat. Immediately stir in the vanilla extract (if using) and the green food coloring. Start with a few drops and add more until you achieve your desired shade of Christmas tree green. Stir until the color is completely uniform.
- Incorporate the Cereal: Quickly add the 6 cups of Rice Krispies cereal to the marshmallow mixture. Using the greased spatula, gently fold and stir until every piece of cereal is thoroughly coated in the green marshmallow mixture.
Part 2: Shaping the Trees
- Fill the Molds: Take handfuls of the warm mixture and press them firmly but gently into the cavities of your greased Christmas tree molds. Ensure you fill every branch and tip. If you are using a pan, press the entire mixture evenly into the prepared 9×13 inch pan.
- Create the Trunk: While the mixture is still soft and pliable, insert the broken end of a pretzel stick into the bottom center of each tree to form the trunk. Press it in about half an inch to secure it.
- Let Them Set: Allow the molds to sit at room temperature for at least 60-90 minutes, or until completely firm and cool to the touch. If you used a pan, let the entire slab cool before proceeding to cut out tree shapes with a knife or cookie cutter.
Part 3: Decorating Your Edible Evergreens
- Unmold the Trees: Once completely set, carefully pop the trees out of the silicone molds. If they resist, gently flex the mold from the sides. Place them on a parchment-lined cooling rack.
- Prepare the “Glue”: Melt your green candy melts or white chocolate according to the package directions (usually in 30-second intervals in the microwave, stirring between each). If using white chocolate and food coloring, add the coloring once the chocolate is melted. For precise decorating, you can transfer the melted chocolate to a piping bag or a small plastic bag with the very tip of one corner snipped off.
- Decorate!
- Garland and Baubles: Pipe lines of melted chocolate or icing back and forth across the tree to look like garland. Use dots of colored icing or candies to create ornaments.
- The Star: Place a small dab of melted chocolate on the top of the tree and affix a star-shaped sprinkle.
- Snowy Effect: For a dusted-with-snow look, you can lightly sprinkle the trees with white sanding sugar or edible glitter immediately after applying the melted chocolate, before it sets.
- Set and Serve: Allow the decorated trees to sit until the chocolate or icing has fully hardened. This can be sped up by placing them in the refrigerator for 10-15 minutes. Once set, arrange your beautiful, edible Christmas forest on a platter and serve!
Conclusion
Creating these Christmas Tree Rice Krispies Treats is more than just following a recipe; it’s about crafting a memory. The process fills your home with a sweet, buttery aroma and provides a canvas for shared creativity that children and adults alike will adore. They prove that you don’t need complex baking skills to create something truly magical for the holidays. So, gather your ingredients, embrace the playful mess, and get ready to build a delicious, whimsical centerpiece that captures the pure, uncomplicated joy of the season. Happy holidays and happy baking
