Introduction
In the world of baking, few things are as comforting and universally loved as a warm slice of banana bread. It’s a classic treat that transforms overripe, speckled bananas into a moist, sweet, and satisfying loaf. However, traditional recipes often call for a long list of ingredients: eggs, butter, milk, white flour, and refined sugar. This can be a barrier for those with dietary restrictions, allergies, or for anyone who simply wants a quicker, healthier, and pantry-friendly option.
Enter this revolutionary 4-ingredient banana bread. This recipe is a testament to the power of simplicity. By stripping back to just the essentials, it delivers incredible flavor and texture without any compromise. It’s naturally vegan, gluten-free (if using certified GF oats), dairy-free, and egg-free, making it an inclusive treat for almost everyone to enjoy.
But its true magic lies in its ease. This is a “dump-and-stir” recipe requiring no special skills or equipment. It’s the perfect project for beginner bakers, a lifesaver for busy weekdays, and a brilliant way to reduce food waste. This article will delve into why this recipe works so well, provide the complete ingredients and instructions, and answer all your questions in a detailed FAQ to ensure your baking success every single time.
Why This Simple Recipe Works So Well
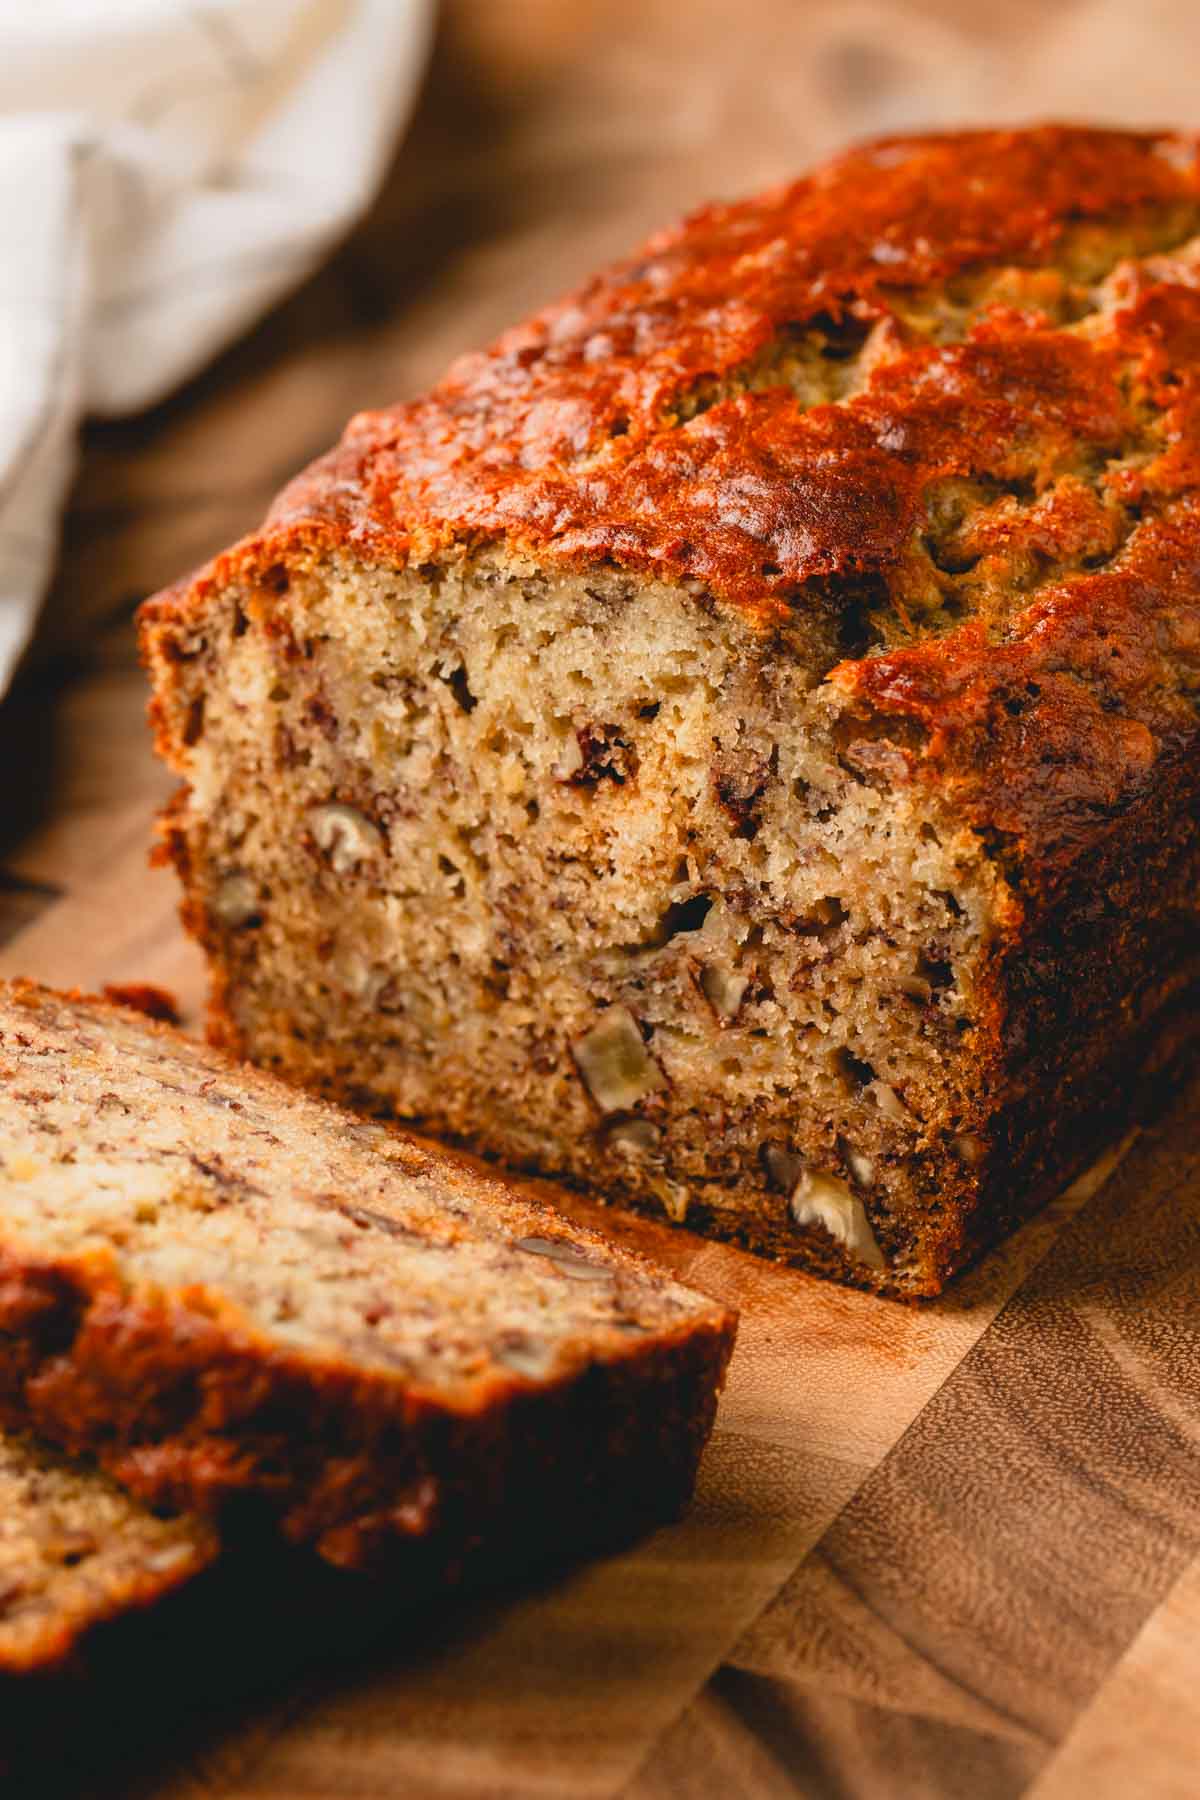
- The Power of Bananas: The star of the show. Overripe bananas are not just sweet; they act as a binder and moisture agent, replacing the eggs and oil you’d find in a traditional recipe. Their natural sugars caramelize during baking, creating a deep, rich flavor.
- Oat Flour: The Wholesome Base: Oat flour, simply ground-up oats, is a nutritional powerhouse. It adds a heartiness and slightly nutty flavor that pairs perfectly with the bananas. It’s a whole grain, providing more fiber and protein than all-purpose flour, and it keeps the loaf wonderfully tender.
- Maple Syrup: Natural Sweetness: Pure maple syrup adds a complex sweetness that refined sugar can’t match. It also contributes to the moistness of the final crumb.
- Baking Soda: The Rise Agent: This is the crucial leavening agent that gives the bread its lift and light, airy texture, ensuring it’s not a dense brick.
Customizing Your Loaf
The base recipe is a blank canvas. The suggested add-ins like cinnamon, nuts, or chocolate chips are highly recommended to elevate the flavor profile.
- Cinnamon: Adds a warm, familiar spice that complements the banana perfectly.
- Nuts: Walnuts or pecans provide a delightful crunch and earthy flavor.
- Chocolate Chips: A handful of dairy-free chocolate chips turns the bread into a decadent dessert-like treat.
The Result: A loaf that is surprisingly light, moist, and perfectly sweet. It has a rustic, wholesome charm that makes it ideal for breakfast, a snack, or a healthy dessert. It’s proof that sometimes, less is indeed more.
The Recipe: 4-Ingredient Vegan Banana Bread
Yields: 1 standard loaf (10 slices)
Prep Time: 10 minutes
Cook Time: 40 minutes
Total Time: 50 minutes
Kcal: ~160 kcal per slice
Ingredients
Base Ingredients:
- 3 large ripe bananas, mashed (about 1 ½ cups)
- 2 cups oat flour (make sure it’s certified gluten-free if needed)
- ¼ cup pure maple syrup or honey (note: honey is not vegan)
- 1 teaspoon baking soda
Optional Add-Ins (choose one or mix):
- ½ teaspoon cinnamon
- ¼ cup chopped walnuts or pecans
- ¼ cup dairy-free chocolate chips
Instructions
- Preheat and Prepare: Preheat your oven to 350°F (175°C). Grease a standard 8×4 or 9×5 inch loaf pan with a little oil or line it with parchment paper for easy removal.
- Mash Bananas: In a large mixing bowl, peel the bananas and mash them thoroughly with a fork or potato masher until smooth with only a few small lumps.
- Add Sweetener: Pour in the ¼ cup of pure maple syrup (or honey) into the mashed bananas. Stir until they are fully combined and the mixture is uniform.
- Combine Dry Ingredients: Add the 2 cups of oat flour and 1 teaspoon of baking soda directly to the wet mixture. If you are using any optional add-ins like cinnamon, add them now.
- Mix the Batter: Gently fold the dry ingredients into the wet ingredients using a spatula. Mix until just incorporated. Do not overmix! A few streaks of flour are okay. Overmixing will make the bread dense. If you are adding nuts or chocolate chips, fold them in at the very end.
- Bake: Pour the batter into your prepared loaf pan and use the spatula to smooth the top into an even layer.
- Bake: Place the pan in the preheated oven and bake for 35-40 minutes. The bread is done when the top is golden brown, firm to the touch, and a toothpick or knife inserted into the very center of the loaf comes out clean.
- Cool: This is a crucial step! Let the bread cool in the pan for at least 10 minutes. Then, carefully transfer it to a wire rack to cool completely before slicing. This resting time allows the structure to set and makes it much easier to slice neatly.
- Serve and Store: Slice, serve, and enjoy! Store any leftovers in an airtight container at room temperature for 2-3 days or in the refrigerator for up to a week.
Frequently Asked Questions (FAQ)
Q1: Can I make my own oat flour?
A: Absolutely! It’s very easy and cost-effective. Simply take 2 to 2 ¼ cups of rolled oats (old-fashioned oats) and blend them in a high-speed blender or food processor until they form a fine, powdery flour. Make sure to measure out 2 cups of this ground flour for the recipe.
Q2: My bananas aren’t very ripe. Can I still use them?
A: For the best results, we highly recommend using overripe bananas with brown spots on the peel. These bananas are much sweeter, mash easier, and have a more concentrated banana flavor. Using yellow or green bananas will result in a less sweet loaf and a denser texture. To quickly ripen bananas, you can place them on a baking sheet in a 300°F (150°C) oven for 15-20 minutes until the skins blacken.
Q3: Is this recipe gluten-free?
A: It can be, but you must ensure you use certified gluten-free oats. Oats are naturally gluten-free, but they are often processed in facilities that also handle wheat, barley, and rye, leading to cross-contamination.
Q4: Can I use a different sweetener?
A: Yes. The ¼ cup of maple syrup can be replaced with an equal amount of honey (though it will no longer be vegan), agave nectar, or even a sugar-free syrup like monk fruit syrup. The flavor profile will change slightly, but the structure will remain.
Q5: Why is my bread dense or gummy?
A: The most common causes are:
- Overmixing: Once you add the dry ingredients, mix until just combined. Overmixing develops the gluten in the oats, leading to a tough, dense texture.
- Underbaking: Ovens vary. Make sure a toothpick inserted into the very center of the loaf comes out clean or with just a few moist crumbs attached.
- Incorrect Flour Measurement: If you packed your homemade oat flour into the measuring cup, you might have used too much. The best practice is to spoon the flour into the measuring cup and level it off.
Q6: Can I make this into muffins instead?
A: Definitely! This batter works perfectly for muffins. Divide the batter into a lined muffin tin and bake at the same temperature (350°F/175°C) for 18-22 minutes, or until a toothpick comes out clean.
Q7: How should I store the banana bread?
A: Once completely cooled, store the loaf in an airtight container at room temperature for 2-3 days. For longer storage, wrap it tightly and refrigerate for up to a week, or freeze individual slices for up to 3 months. Let it come to room temperature or warm it up before serving.
Q8: Can I add a protein powder to this recipe?
A: You can, but it will alter the texture. If you want to try, replace ¼ cup of the oat flour with your favorite vanilla or unflavored vegan protein powder. You may need to add a tablespoon or two of plant-based milk if the batter becomes too thick.
Q9: My bread is browning too quickly on top! What do I do?
A: If the top is getting dark brown before the center is cooked, simply place a loose tent of aluminum foil over the top of the loaf pan for the remainder of the baking time. This will shield it from direct heat while allowing the inside to finish baking.
Q10: Is this recipe suitable for meal prep?
A: It’s an excellent meal prep option! Bake a loaf at the beginning of the week for ready-to-go breakfasts and snacks. You can also pre-measure the dry ingredients (oat flour, baking soda, cinnamon) in a jar for an even faster mix later.
