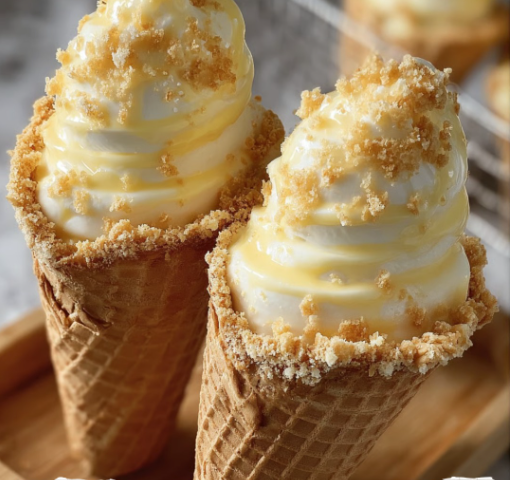
A Whimsical Handheld Dessert with Creamy Banana Pudding & Crunchy Wafer Crust
Transform classic banana pudding into adorable edible cones with a luscious no-bake cheesecake filling, buttery vanilla wafer crust, and dreamy whipped cream topping!
Why These Dessert Cones Will Steal the Show
✨ Playful presentation – Fun alternative to bowls or jars
🍌 Perfect flavor balance – Ripe banana meets tangy cheesecake
🥄 No-bake convenience – Ready in under 30 minutes active time
🎉 Crowd-pleasing – Ideal for parties, showers, or kids’ events
Ingredients & Tools
Cheesecake Filling
| Quantity | Ingredient | Key Role |
|---|---|---|
| 455g (16oz) | Full-fat cream cheese | Rich, creamy base |
| 120g (1 cup) | Powdered sugar | Sweetens & stabilizes |
| 120ml (½ cup) | Heavy whipping cream | Lightens texture |
| 5ml (1 tsp) | Vanilla extract | Flavor enhancer |
| 96g (1 pkg) | Instant banana pudding mix | Intense banana flavor |
| 360ml (1½ cups) | Cold whole milk | Pudding activator |
Cone Assembly
| 10-12 | Waffle/sugar cones | Edible vessels |
| 120g (1½ cups) | Vanilla wafers | Crunchy texture |
| 28g (2 tbsp) | Melted butter | Binder for crust |
Garnish Station
- Sliced bananas (toss in lemon juice to prevent browning)
- Fresh whipped cream
- Extra crushed wafers
- Caramel sauce (for drizzle)
Essential Tools:
- Piping bag with star tip (for pretty filling)
- Tall glasses (to hold cones upright while filling)
Step-by-Step Instructions
1. Make the Cheesecake Base
- Beat softened cream cheese with powdered sugar until smooth
- In separate bowl, whip heavy cream to soft peaks
- Gently fold whipped cream into cheese mixture
2. Create Banana Pudding Layer
- Whisk pudding mix + cold milk for 2 minutes
- Let thicken 5 minutes
- Fold into cheesecake base
3. Prep the Cones
- Crush wafers (some fine, some coarse)
- Mix with melted butter
- Dip cone rims in mixture, then roll
Pro Tip: Use honey to help crumbs adhere better
4. Fill & Decorate
- Pipe filling into cones using star tip
- Top with:
- Banana slices (fresh or caramelized)
- Whipped cream rosette
- Wafer crumbs
- Caramel drizzle
5. Serving Suggestions
- Insert cones into floral foam for display
- Serve with mini spoons for easy eating
- Pair with vanilla milkshakes
Expert Techniques
Preventing Soggy Cones
✔ Fill just before serving
✔ Use chocolate-lined cones for extra barrier
✔ Store filling separately until assembly
Flavor Variations
🍫 Chocolate Lover’s: Add cocoa powder to filling
🍓 Berry Burst: Layer with strawberry compote
☕ Tiramisu Style: Coffee-soaked ladyfingers
Make-Ahead Guide
Up to 2 Days Ahead:
- Prepare filling (store covered)
- Crush cookies
- Slice bananas (store in lemon water)
Last Minute:
- Assemble cones
- Add garnishes
Troubleshooting
Issue | Solution
Runny filling | Add 1 tbsp cornstarch to pudding mix
Crumb coating falls off | Chill cones 10 mins after coating
Bananas browning | Dip in citrus juice or honey
Presentation Pro Tip: For garden-party elegance, stand cones in a bed of granulated sugar “sand” with edible flowers!
These delightful cones offer all the nostalgia of banana pudding with the fun of an ice cream cone. Perfect for when you want dessert to be both delicious and Instagram-worthy!
Share your creations! #BananaCheesecakeCones 🍌🎀
