📝 Introduction
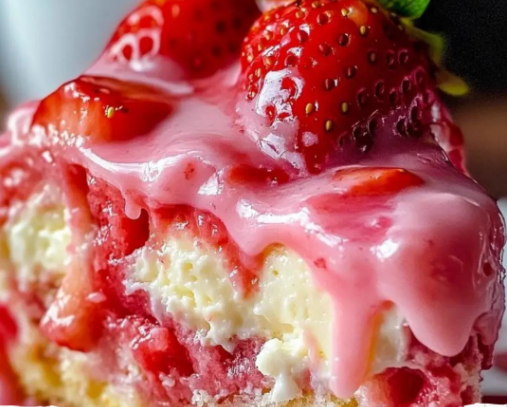
The Earthquake Cake got its name from the way it cracks and swirls as it bakes—revealing ribbons of cream cheese, chocolate, and fillings. This Strawberry version takes the classic Southern favorite and gives it a fruity, summery twist.
Imagine:
- A base of moist strawberry cake
- Ribbons of sweetened cream cheese filling
- Bursts of juicy strawberries
- Melty white chocolate chips throughout
- All topped with a slightly crisped, golden top that “quakes” as it cools
No frosting needed—this cake is rich, sweet, and messy in all the right ways!
🧾 Ingredients
For the Cake:
- 1 box strawberry cake mix (15.25 oz), plus ingredients listed on box (usually eggs, oil, water)
- 1 cup fresh or frozen strawberries, chopped (optional, but recommended)
- 1/2 cup white chocolate chips
- Optional: 1/2 cup sweetened shredded coconut (for texture)
For the Cream Cheese Swirl:
- 8 oz cream cheese, softened
- 1/2 cup (1 stick) unsalted butter, melted
- 2 cups powdered sugar
- 1 tsp vanilla extract
👨🍳 Instructions
🔹 Step 1: Preheat Oven & Prepare Pan
- Preheat oven to 350°F (175°C).
- Grease a 9×13-inch baking dish or line with parchment paper.
🔹 Step 2: Prepare the Cake Mix
- Make the strawberry cake batter according to the package directions.
- Gently fold in the chopped strawberries and white chocolate chips (and coconut if using).
- Pour the batter into the prepared baking dish and spread evenly.
🔹 Step 3: Make the Cream Cheese Swirl
- In a mixing bowl, beat the softened cream cheese until smooth.
- Add the melted butter, powdered sugar, and vanilla. Beat until creamy and thick but pourable.
- Dollop spoonfuls of this mixture across the top of the cake batter.
- Using a knife or skewer, gently swirl the cream cheese mixture through the cake batter. Don’t overmix—you want visible ribbons.
🔹 Step 4: Bake
- Bake at 350°F for 40–45 minutes, or until the edges are golden and a toothpick comes out with just a few moist crumbs (not raw batter).
- The center may jiggle slightly from the cream cheese mixture—that’s okay!
🔹 Step 5: Cool and Serve
- Allow the cake to cool in the pan for at least 30–45 minutes before slicing.
- Serve warm, room temp, or chilled (each version has a different texture delight!).
🍽️ Serving Ideas
- Warm with vanilla ice cream 🍨
- Topped with whipped cream
- A drizzle of strawberry sauce or chocolate syrup
- For brunch: serve with coffee or mimosas!
❓ Frequently Asked Questions (FAQs)
1. Can I use frozen strawberries?
Yes! Thaw and drain well before adding to the batter to avoid excess moisture.
2. Can I make this with other cake mix flavors?
Absolutely! Try white cake mix, vanilla, or even lemon for a twist. Add strawberry flavor with extract or fresh berries.
3. Do I need to refrigerate the cake after baking?
Yes—because of the cream cheese filling, it’s best to store leftovers covered in the refrigerator. Enjoy within 4–5 days.
4. Can I freeze Strawberry Earthquake Cake?
Yes! Let the cake cool completely, wrap tightly, and freeze for up to 2 months. Thaw in the fridge overnight or microwave slices for 20–30 seconds.
5. What makes the “earthquake” effect happen?
The cream cheese mixture is heavier than the cake batter, so it sinks and swirls while baking, creating cracks, ribbons, and that signature broken surface.
6. Is it supposed to be gooey in the middle?
Yes! That’s part of the charm. The cream cheese swirl stays soft and gooey—it sets more as it cools.
🌟 Tips for Success
- Use room temperature cream cheese for smooth blending.
- Don’t over-swirl—just a few passes to marble the batter.
- Line your baking dish if you want cleaner slices or plan to remove the cake from the pan.
- Let the cake cool before slicing or it will fall apart (deliciously, but messily).
Would you like:
- A printable version of this recipe?
- A chocolate-covered strawberry version?
- A version made with lemon cake mix for a tangy twist?
Let me know and I’ll customize it for you!
